Last
week, I recorded a video about the polarization of waves, especially light
waves. One of the best ways to learn about polarization is to experience it!
Get Polarized!
Pick
up some supplies like a pair of polarizers or some sunglasses to try out the demos yourself. After learning about polarization demos and labs in
this article and my video, you will probably want to order a class set of polarizers.
Every student should engage with these polarizing filters in a hands-on manner.
The behavior of polarizers is that either one
will let some light through, even when they overlap, but when they are crossed,
they do not let light through.
What can we learn about light from using
polarizing filters?
We
can learn that light travels in transverse waves. Imagine a transverse wave
like the ones on a slinky. There is up and down and left and right and all
mixed up. But I can polarize the wave and allow it to travel in just one plane.
No matter what crazy wave I try to send, only the horizontal components will
get through. This is what is happening to the light when we use a polarizer and
it proves that light is a transverse wave.
Regular
light, from the sun or a flashlight, is randomly unpolarized, but sending it
through a polarizer polarizes it. In some cases, we have vertically
polarized light. Sending this through a second polarizer, often called an
analyzer, might not permit any light to pass, especially if the polarizers are
at right angles. Cancelling light by crossing polarizers is called extinction.
My
video will show a very cool demo using three polarizers. If we have two
polarizers crossed to extinction, and we add a third polarizer in between, we
still get light to pass through them.
Why Should You Do This
Demo?
What
does it show? This experiment helps us understand what it means for something
to be polarized. It means that it is oscillating
in a specific orientation, as a vector.
A
vector can be broken down into its components. It is these components of the
light that oscillates diagonally that get through the triple polarizer.
Therefore, the diagonal polarizer allowed these components to pass through, and
the third polarizer let the components of those components to pass through.
See the World
Differently…through Polarizers
Did
you know that Liquid Crystal Displays or LCDs are polarized? You can have a lot of fun by putting a
polarizer in front of your computer screen which is probably an LCD screen.
These screens are linearly polarized usually diagonally. Now try it out on your
watch or your calculator!
Reveal the “Stress” these Everyday Items
are Under
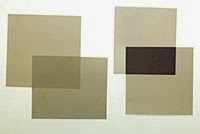
Crossed
polarizers can reveal the amount of stress in a transparent object. For example,
the photo of a polarized protractor, above, demonstrates that in some places there is more stress than others.
The
revelation is made by the medium repolarizing the light in between two
polarizers that have already been crossed to extinction. You can do this by
stretching transparent tape, too. Next take a look at rulers or plastic
silverware or the safety goggles in your lab.
In my video, I will even show a
shattering “Prince Rupert’s Drop.”
Nice Shades: Reducing Glare
One
of the main purposes of polarizers is to eliminate glare. How does this
work? Well, glare is either partially or
completely polarized, whether it is glare on the surface of your black lab
tables or glare on water puddles.
Glare
tends to be made of polarized light that is oscillating in the same plane as
the surface that is reflecting it. For example, the surface of the black lab
tables have glare that is polarized left and right.
The Sky
The
blue sky is a glare from the sun scattered by air molecules and it is partially
polarized. The polarization is at a maximum at positions that are at 90 degrees
from the sun arms.
Go outside and rotate the polarizer; you should notice that
the sky gets darker as you rotate it. Photographers sometimes use this effect
to make the clouds look more dramatic. You can try using it for fun and to better
see the moon during the day.
Iceland Spar
The
crystal above is
called Iceland spar. It is a type of calcite, a metamorphic rock from Iceland
that possesses the unique property of double
refraction.
There are two different refractive indexes and each of the
images has a different axis of polarization.
Before
artificial polarizers were created, Iceland spar was the original polarizer. It was Iceland spar that convinced Augustin Fresnel that light was not just a wave, but a transverse wave. When a crystal
like this one is cut and made to act as a polarizer it is sometimes called a
Nicol Prism.
If you go to a 3-D movie, save the
glasses!
If
you want to know more about what 3D glasses and polarizers have in common, you
will just have to wait (in total suspense) for my video. In the meantime, start
collecting 3D glasses for your classroom.
The plastic film can be removed from
the surface of the glasses, and what remains is just a linear polarizer. If you
do not yet have a class set of little polarizers, you should definitely start
collecting 3D glasses. Maybe even offer some extra credit to your students.
**In my next post, I will discuss how you
can use Polarizers to analyze the Faraday Effect and the Brewster Angle.